Overview
The floor in the crew compartment can be broken out into three regions, the left section under the bench, the center section which is the “traveled” section, and the right section, which is where the wood stove goes. In the text below I discuss the flooring repairs in the order I did them, right, center, and left. All the work was done near the end of 2012, from November 26 until December 23, It was the last thing I did before closing up the car for the winter. While the floors are now structural sound and put back together, they are far from actually finished. Ignoring for the moment the fact they were covered in Linoleum, I still have to at least sand and smooth out the joints. As I do not anticipate covering the floors until at least most of the car is complete, I will simply paint them “battleship grey” to simulate the Linoleum for now.
Right Side
I had already decided that before I was going to fix the floor in this area I should sand down the walls and primer paint them. The “walls” in this case is the steel siding of the car. As this area contained the stove, the walls had been covered in galvanized steel and underneath was insulation. This was all long gone by the time I got the car. The wall renovation is covered under another section, “Crew Compartment – Walls”.
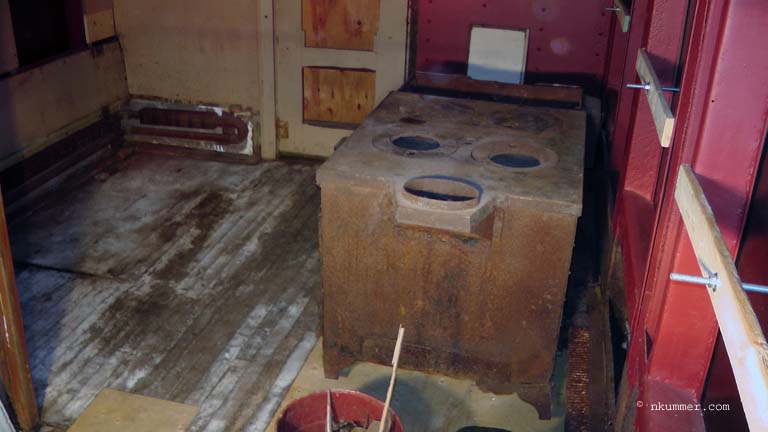
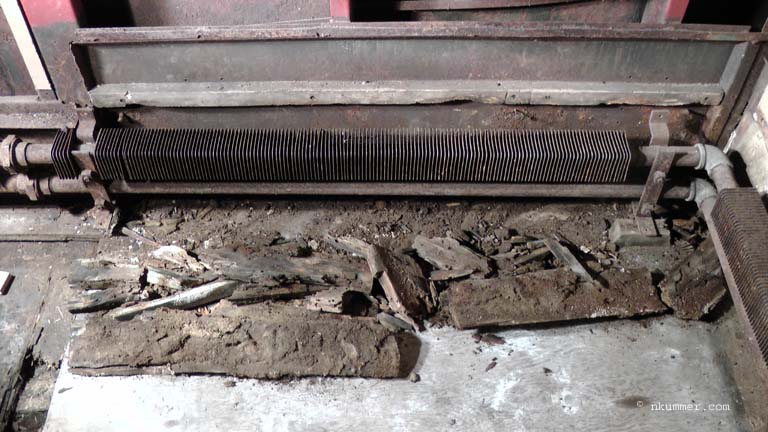
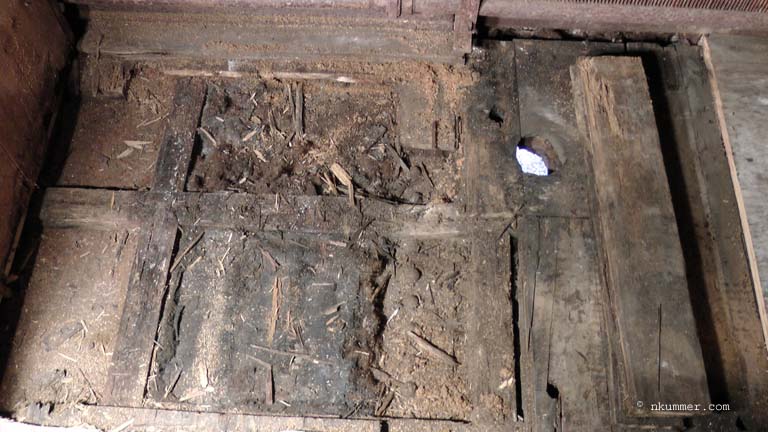
So this is what I started with. The floor had been ripped out in a previous attempt by the RMEO volunteers to fix the car. I estimate that this was done a long time ago, maybe around 1995. It has sat like this until I got to it in July 2012. The yellow thing in the picture is part of scaffolding for a ladder. It was stored in the car.
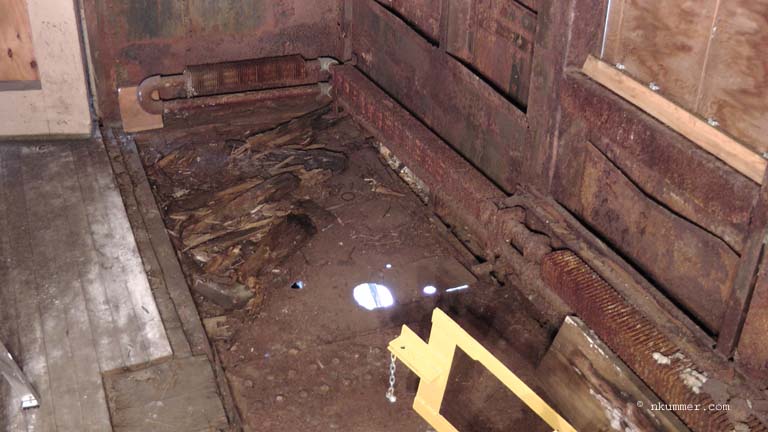
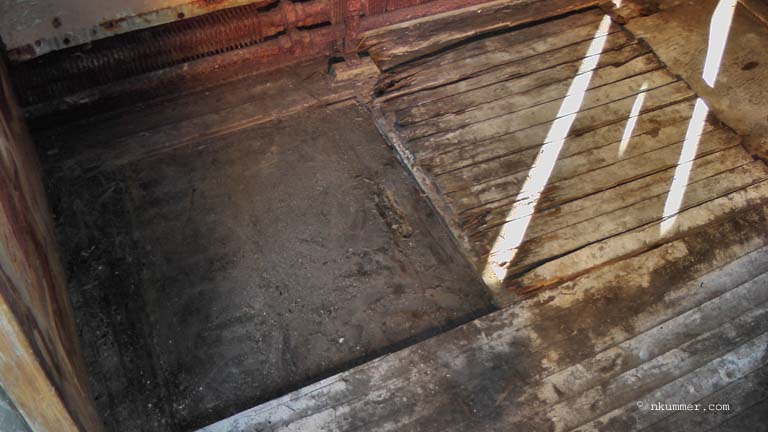
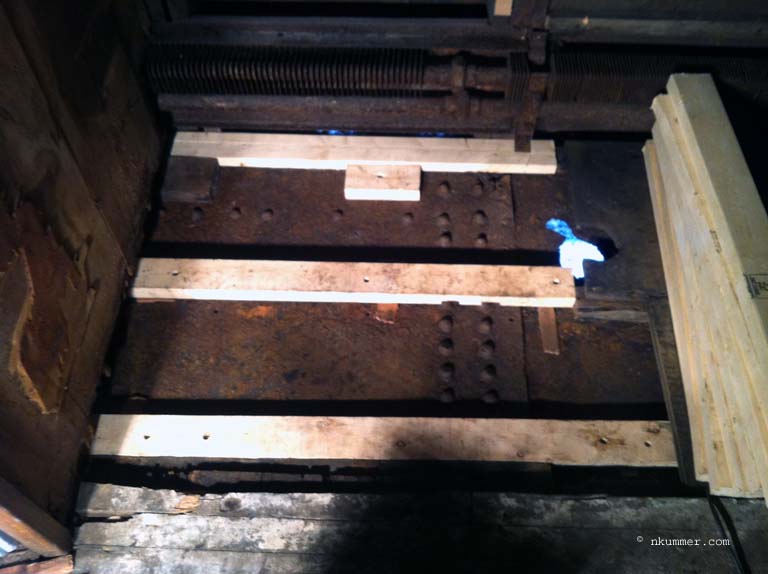
August 21, 2012 – After some major cleaning with a shovel, removing pile of rotten wood and even more chunks of rust from the floor (yikes!), this is what we have. You can see that I also started on the walls. So you are wondering about all the holes in the floor, well so am I? None of those holes are used in the current configuration of the car. Therefore I have to assume that they are pre 1956 alteration into a Combine … but then maybe not … hold that thought for a few more pictures. So the only thing I can be reasonably certain of is the hole on the left, which is the hole for the toilet, as this area would have held the washrooms. Yes, it was just dumped to the tracks. Now the hole was patched with a piece of steel from underneath, which you can just barely see hanging there. I reattached it with screws before doing any more work. I left all the other holes in place.
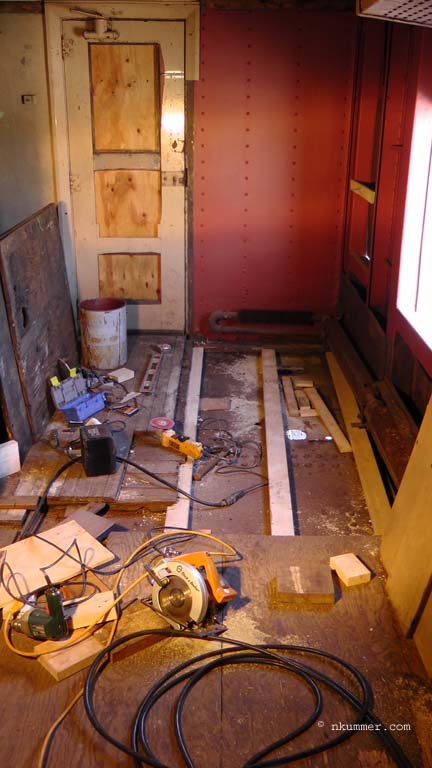
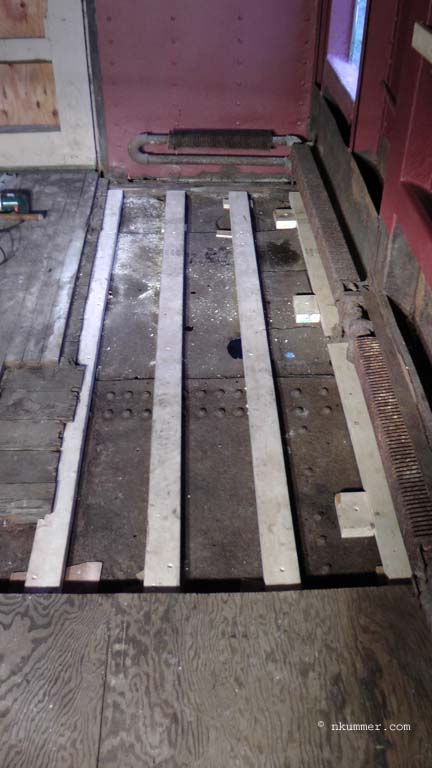
November 26, 2012 – Winter is coming and I really want to finish the floor before the snow. I had spent the summer getting the car ready for winter (like fixing the roof and making winter windows), so this was my truly first indoor project. The first thing I had to do was to lay down new “floor joists”. This turned out to the hardest part, and it had to be done correctly. The joists had to be at just the right height so when the two layers of finished plywood flooring were added, it all came out to the same height as the existing flooring in the center of the crew compartment. What actually made the job hard was the steel floor was not level. You can see some “shims” (if you call a 1×3 a shim 🙂 ), and in other areas I had to grind out parts of the 2×4 to get it low enough (and hence the angle grinder in the picture). Over the span of one joist there is a difference of over 1 ¼ inches (3cm). Unfortunately I don’t have any pictures of the detailed 2×4 work. This picture shows the work in progress. Also note the small black space heater. By now it was getting cold outside, and while it could not heat the car, it did help keep my hands warm when I worked next to it.
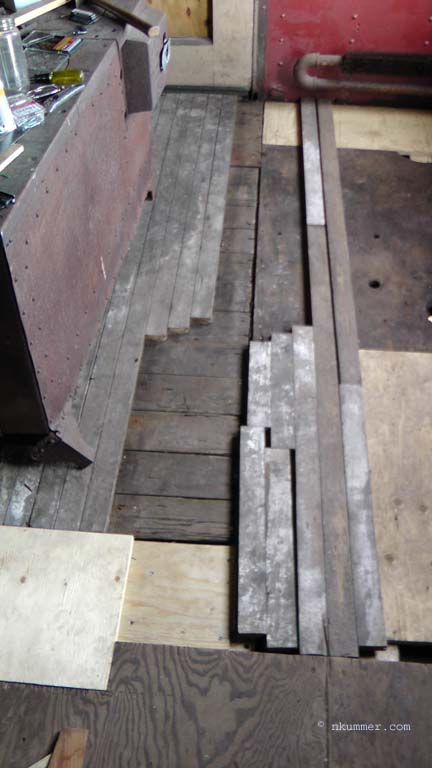
December 02, 2012 – I have completed the base layer. It took me about 10 hours just to get these joists installed perfectly level. They are screwed to the floor with 3” screws that go directly into the steel. They will not move! The 2×4 on the right, next to the wall, is mainly held in place by the blocks. It was not possible to screw them in all the way because of the reinforced flooring below them. They are jammed between the wall and the 2×4 blocks.
December 02, 2012 – I put in this picture to show that if there was any wood left that was in reasonable shape, I did leave it in. One of the objectives is to keep as much as possible. Even though no one will see it today, if someday the floor is taken up, they will find it. You can see I also reattached the old toilet hole patch.
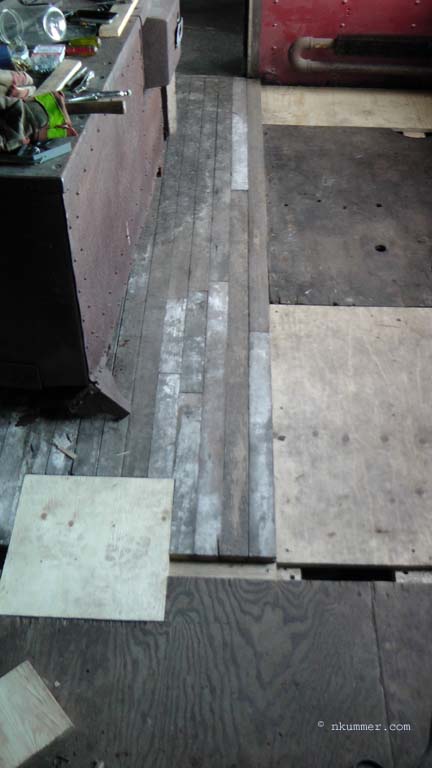
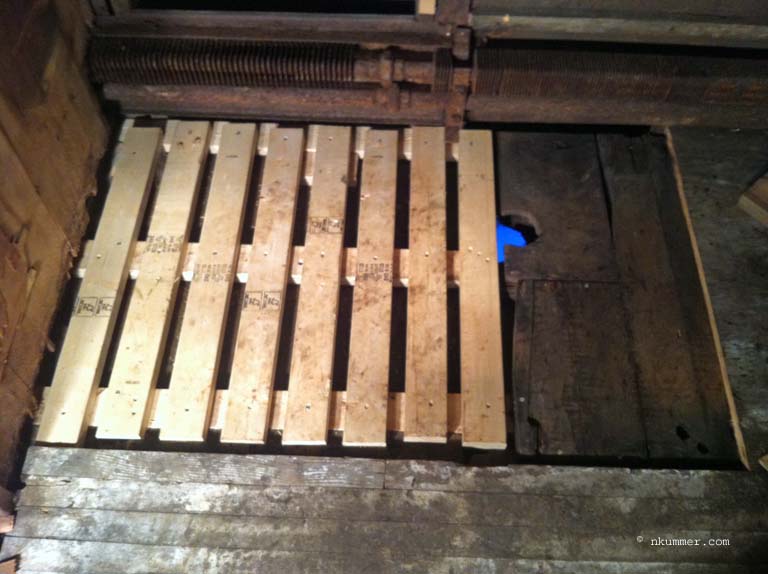
December 04, 2012 – It is the end of the day and I have finished installing the first layer of plywood. This went right over top of the floor joists. The new floor has three pieces of plywood. The middle piece, the black piece, was from the car and was removed as part of the earlier renovation attempt. I know it goes exactly where I placed it as the holes in it line up perfectly with the holes in the floor. Notice that it has a cut out for the toilet hole. This would imply that the wood is original to the car.
December 06, 2012 – Here I have managed to fix the center flooring section. I was able to add in the missing tongue and groove pieces by using pieces that were taken from other parts of the car that have already had there floor replaced with plywood (more on that in the Seating Compartment section). I also made a new cover for the king pin hole so I don’t trip into that hole (again). See the section below in the Center Floor Section. I built that area and finished this area in one day, December 06, 2012
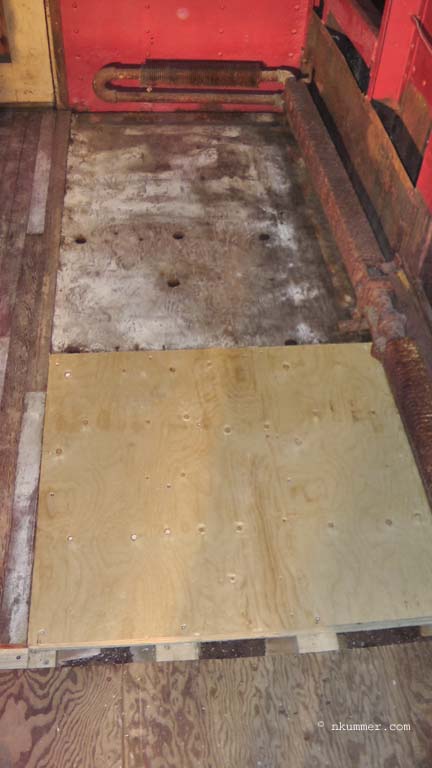
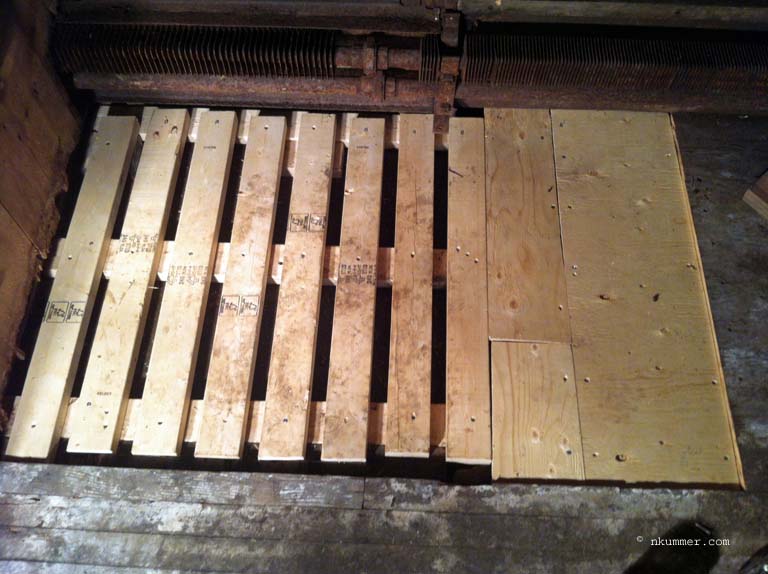
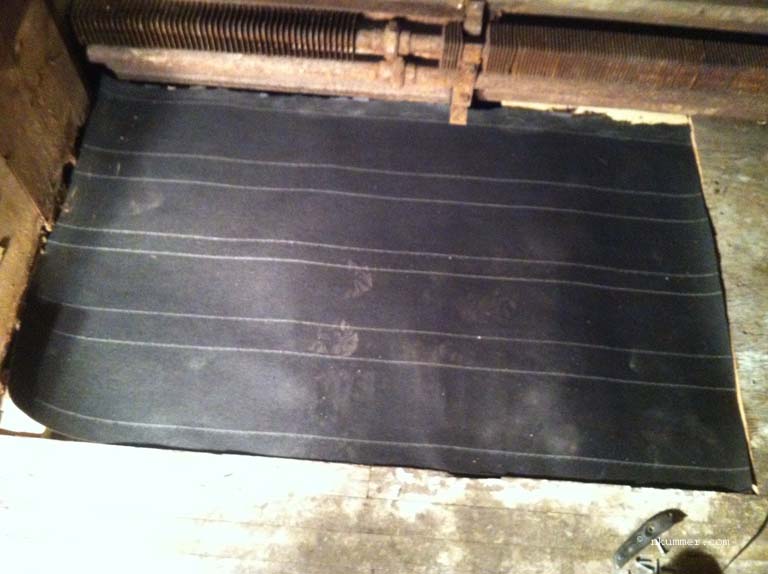
December 06, 2012 – Done! The final layer is installed. For this layer you can see it uses two pieces of wood. The new stuff, and the white one that was removed as part of the earlier renovation attempt. Again, I know it goes in the location as it lines up with SOME of the holes in the black plywood installed in the first layer. So remember earlier I told you to hold that thought about the why there are holes in the floor … well here is the mystery. If this new layer was installed in 1956 for conversion to a Combine, then why are there any holes in the floor? If it was part of the original floor, then why are there no holes for the toilet? So I come to one of two possible conclusions: (1) at one point when it was a colonist car this area was renovated and the washrooms removed, or (2) right after conversion this area did not look exactly like I think it looked. Post conversion there were more changes to this area of the car and none of the holes were no longer needed.
Center
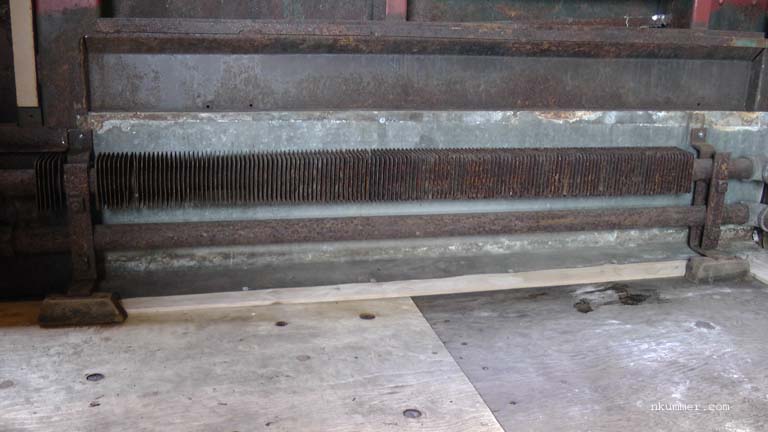
This portion of the floor retains the original tongue and groove flooring. The flooring was generally in good shape, but several pieces we broken or cracked, especially near the left and right edges. Using wood that had been removed from the seating compartment, I was able to patch the necessary areas. I also built a cover for the king pin hole. All this work, and the final layer of plywood for the right side was done in one day, December 06, 2012.
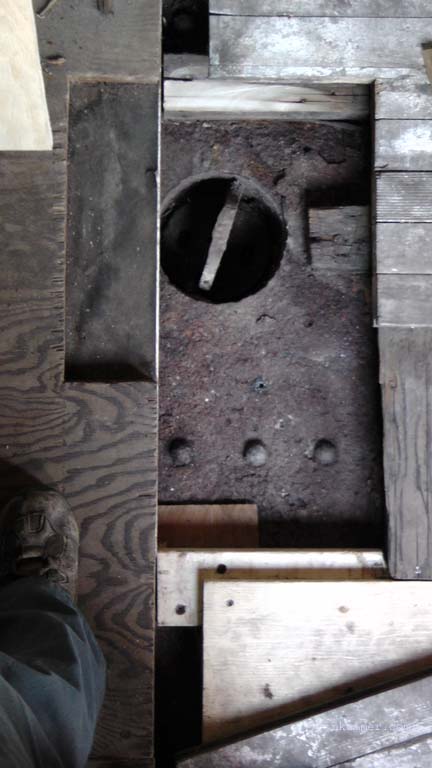
December 06, 2012 – Here we have the king pin hole that needs to be covered. On the right is the crew compartment with its tongue and grove flooring, and on the left is the seating compartment. You can see that this floor has already been replaced with plywood. That project was done under the earlier renovation attempt and is explained in the seating compartment flooring section.
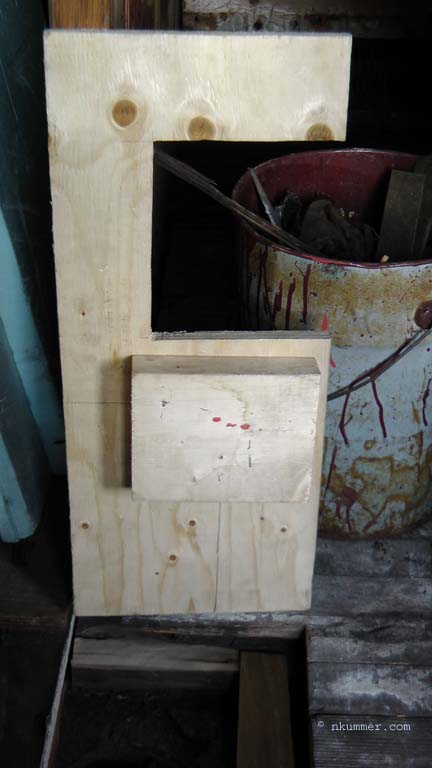
December 06, 2012 – Here we are looking at the bottom of the piece to be installed. The big block of wood on the bottom will rest on the steel floor and support the plywood.
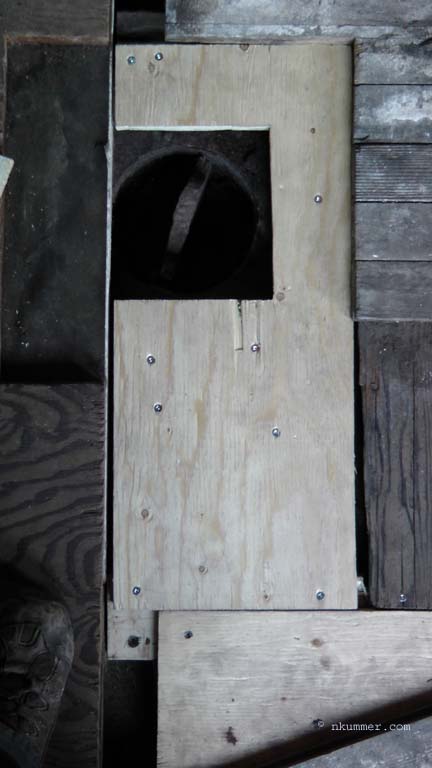
December 06, 2012 – The wood is now installed, with a cut out for access to the king pin. It still needs the top layer of plywood.
December 06, 2012 – The top layer of plywood over the ling pin is complete, and the tongue and grove flooring has been cut to size and is ready to install.
December 06, 2012 – Done! The top later of plywood still has to be added to the right side. It was done later that day.
Left Side
Once the right side and center was complete, I had to tackle this section. While this time the floor did exist, about half of it was very soft and squishy. Not good for floor! This project was supposed to be a quick one before I finished for the season, but as you will see it was much more involved and took much longer than planned. Once again, you will see that the walls had been partially repaired.
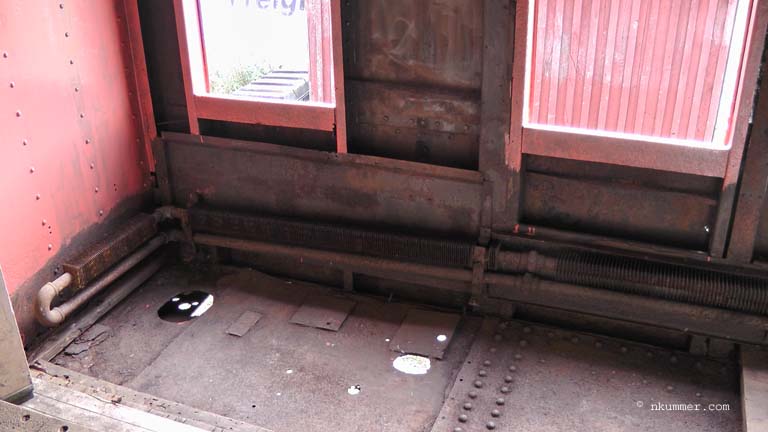
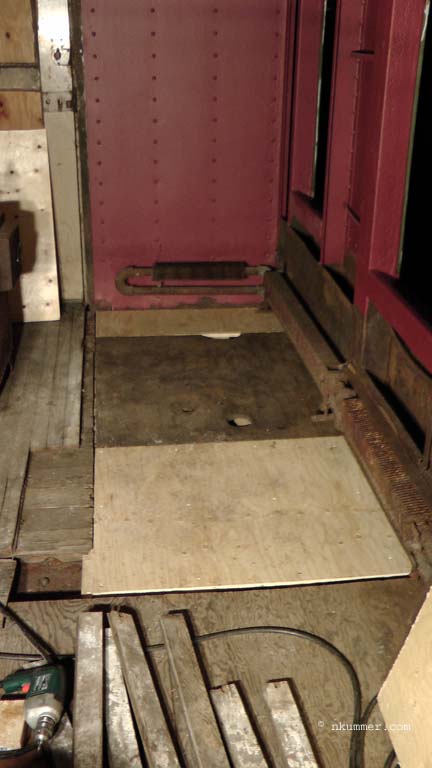
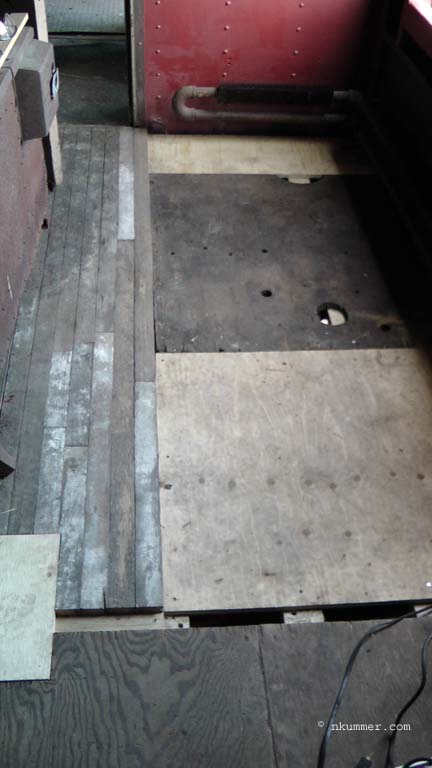
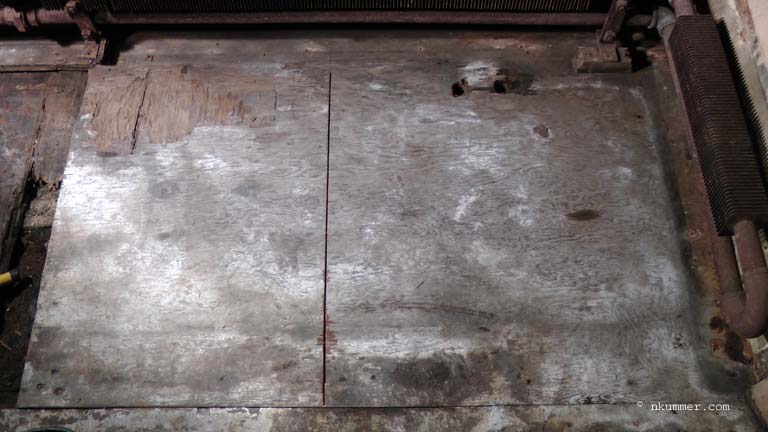
December 11, 2012 – So this is what I started with. You can see the flooring on the right and center sections of the car that I repaired, and now I will tackle the left side. The floor is a mixture of older tongue and grove and new plywood. You will see as we progress that it appears the tongue and grove is original, and that the plywood section replaced some older tongue and grove. The floor below the plywood appeared to be original. The plan was to only replace the tongue and grove as it had become very soft and rotted in places.
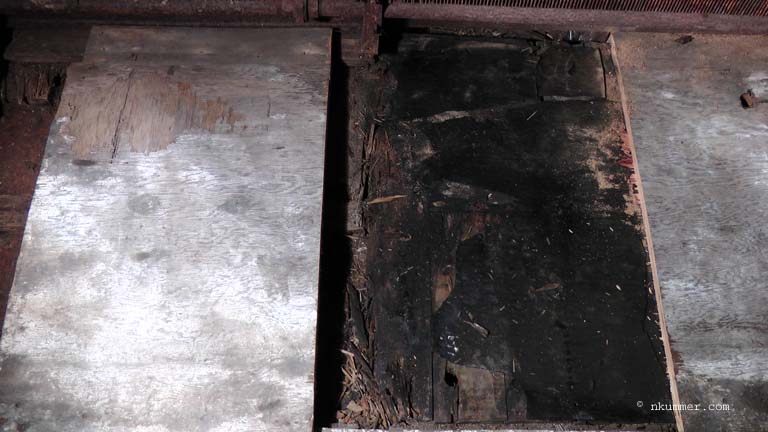
December 11, 2012 – It is early morning (like 9:00) and I have carefully removed the tongue and grove flooring. It is lying on the plywood floor next to where I removed it. For the most part, none of this wood is good, however anything that looked even remotely useful I saved. What you are looking at in the hole is a black tar (roofing) paper covering wood underneath.
December 11, 2012 – Once I removed the paper and cleaned up, we can see what the floor underneath looked like. Clearly not much left here.

December 11, 2012 – It has only been 15 minutes and I am down to the steel floor after removing the bad wood.
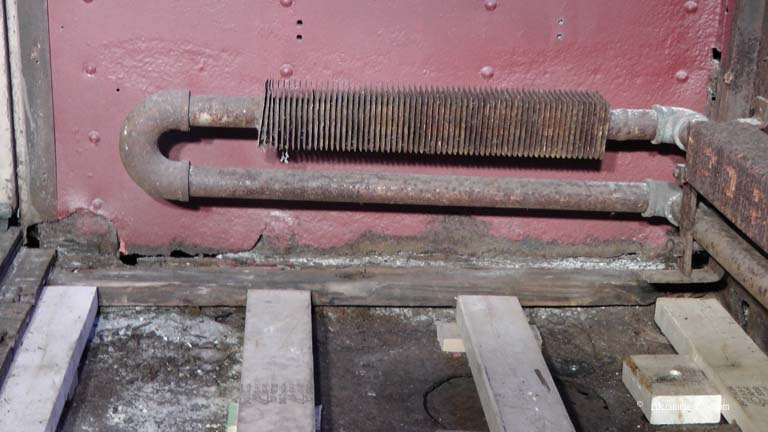
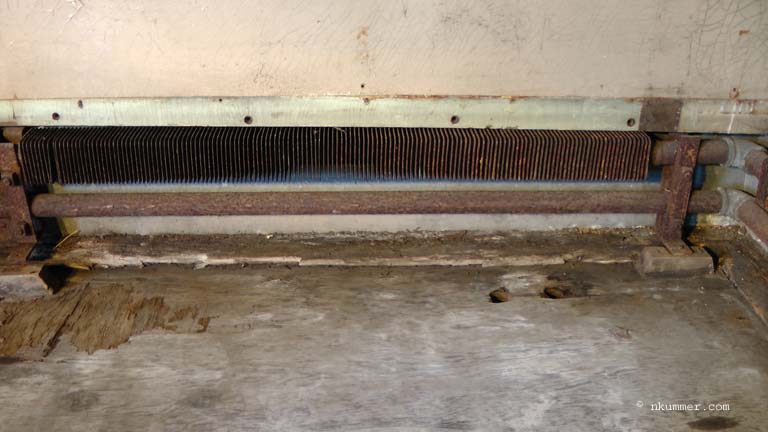
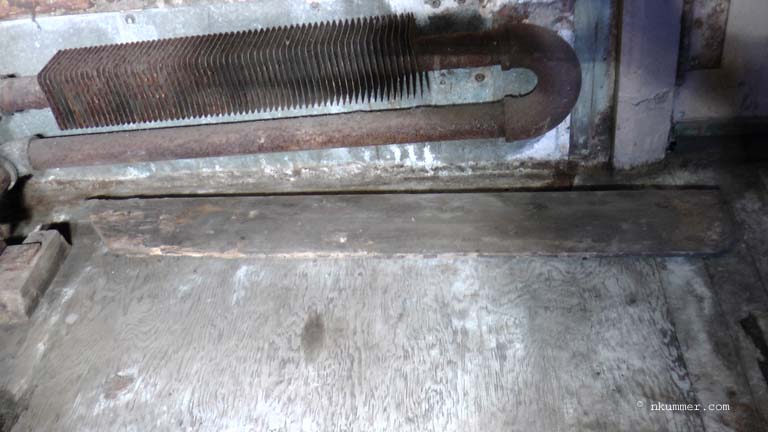
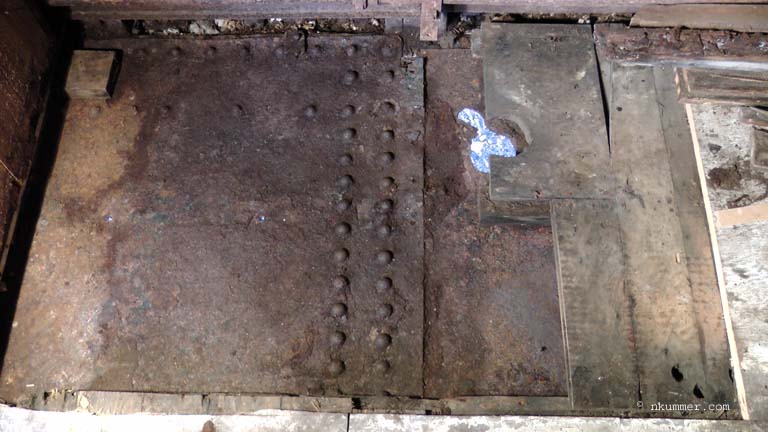
December 11, 2012 – So the plan was to stop here and rebuild the floor simply filling in the missing pieces I have removed. Of course that didn’t work out. As I was trying figure out the thicknesses of the various pieces I would need to make everything level, it was clear that absolutely nothing was fitting. The difference in height from the edge of the cut plywood to the tongue and grove center floor was almost a half inch. More of the floor under the plywood would have to come up until I got back to the level part. Unfortunately, as you can see below, this meant I had to remove the wood trim below the galvanized steel, and the steel itself that is behind the steam pipes as it is on top of the wood (at the base, which is hard to see in the picture). I knew at some point I would have to replace the wood, but I was hoping this would all be a job for another day. On a side note, those two holes are for the air brake lines that enter and exit the car. They go to the valve that is on the front wall of the crew compartment. All those part were there but by this point I have removed them, both to fix the wall and clean the parts. You can see them elsewhere on this web site.
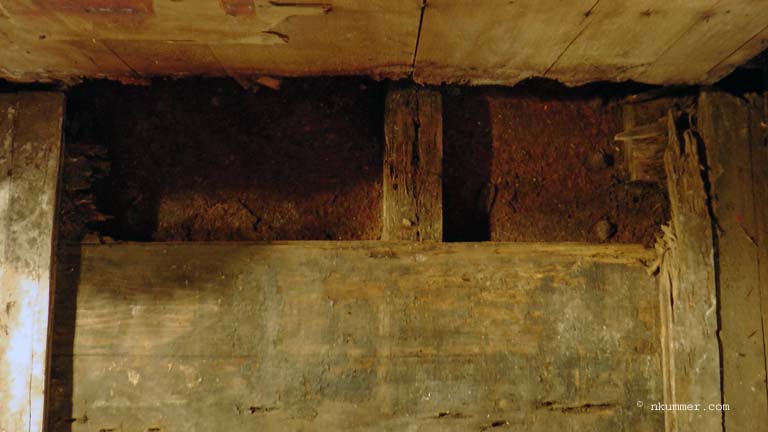
December 11, 2012 – Here is the wood trim from the flooring that was against the front wall. Technically I did not need to remove this as I was not going to lift the plywood this far back, but as luck would have it, the galvanized steel behind it had to come out as it overlapped with the piece on the other wall that I did have to remove. So, long story short, it all had to come out.
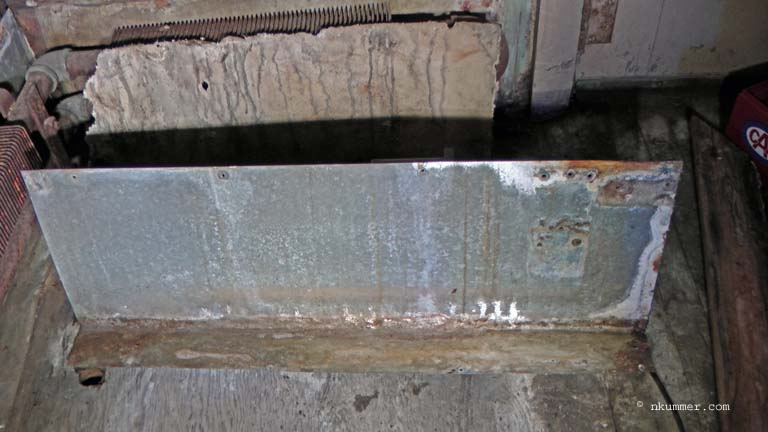
December 11, 2012 – A picture of the galvanized steel and the insulation that was behind it. It’s now 2:00 in the afternoon, and I am about to call it a day. I just spent the rest of the cleaning up and planning the next session. At this time of the year the day is short, and the temperature cools of quickly.
December 13, 2012 – It is 8:30 in the morning and I have just ripped out the wood, or what remained of it, from behind the galvanized steel against the wall. Something else to rebuild.
December 13, 2012 – Now I can finally cut the plywood back enough to where it is more or less level.
December 13, 2013 – I have cut the plywood and shifted it to the left to see what is below. More paper, and below it wood.
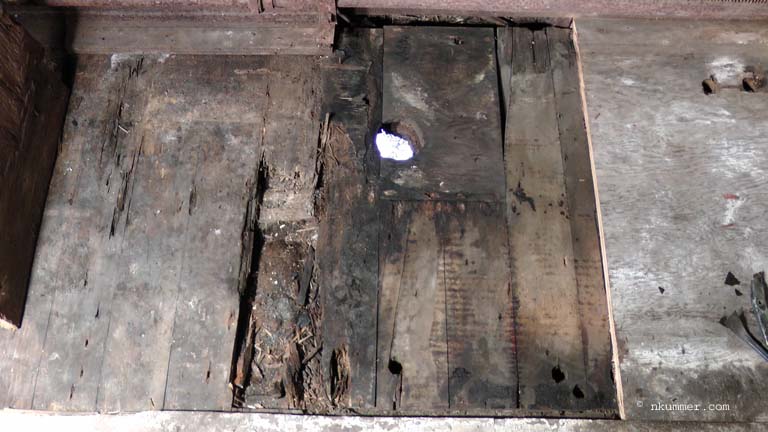
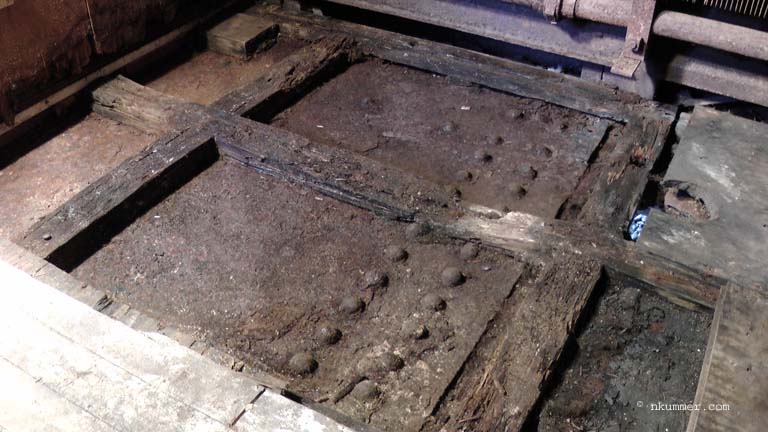
December 13, 2013 – I have removed the paper and now we can see the entire first layer of floor. I know it will all have to come up as this floor is not level. Notice the whole in the center. I am not sure what it is for, but it was not used in recent times.
December 13, 2013 – I have now removed the wood from the left side so you can see what is below it. The black “stuff” in the center is the horse hair insulation that is between the floor joists. Clearly this is original.
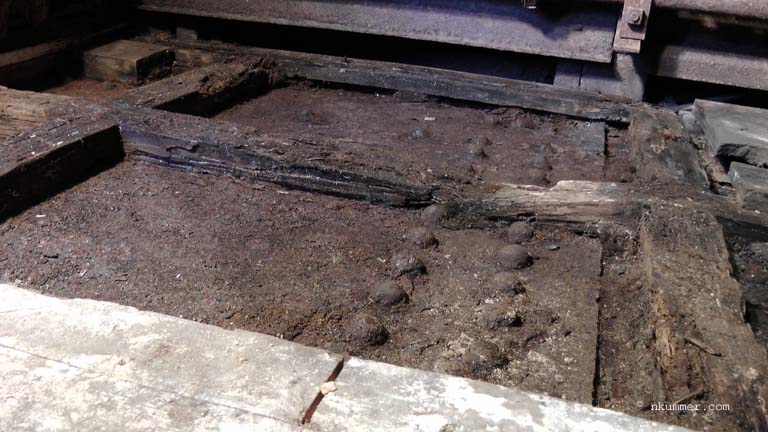
December 13, 2013 – Now I have removed all the insulation and left only the original floor joists. They too will have to come out.
December 13, 2013 – A close up of the floor joists. Now you can see why the floor was not level. Even the steel at the joint is no longer proper, and that is why I had to cut back the floor farther than I planned.
December 13, 2013 – Down to bare clean steel. I was able to figure out that I did not need to remove some of the subfloor. Once I cleaned out underneath I was able to get it reasonably level again. That is where I left it for the day.
December 20, 2013 – Time to start to rebuild. Again I had to carefully lay the first layer of joists to ensure the rest of the floor went well. I spent quite a bit of my time just calculating all the wood thickness so that I would eventually come up to the correct height.
December 20, 2013 – The floor was sufficiently different that I was able to add another layer of 2x4s the other way.
December 20, 2013 – And then I had to add some wood over top of the existing untouched subfloor to get everything to the same height.
December 20, 2013 – And for the last thing I did that day, I cut some roofing paper to put between the layers.
December 23, 2013 – I finally laid the top piece of plywood and a new piece of wood behind the steam pipes.
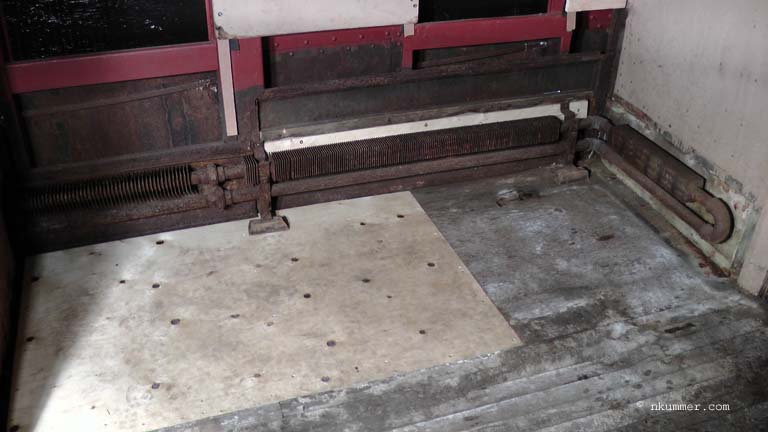
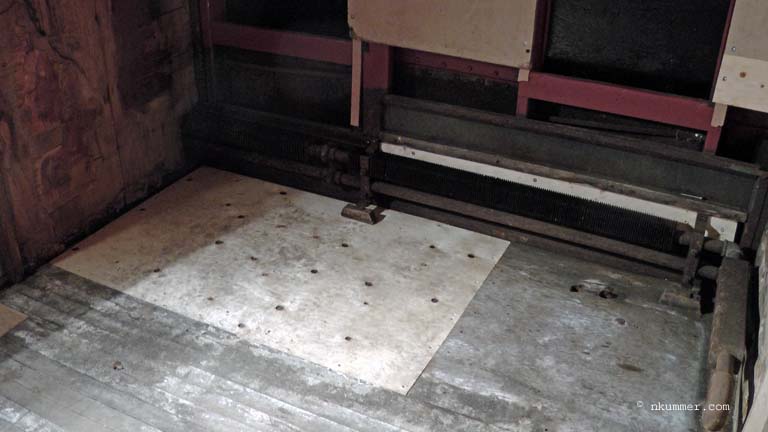
December 23, 2013 – Another view of the completed floor.
It was not until next spring that I installed new floor trim and reinstalled the galvanized steel behind the steam pipes.