Overview
Between the Crew Compartment and the Passenger Compartment there are two walls, one on the left and one on the right. Each wall is from the floor to ceiling, and extends approximately 1 meter into the car. This then leaves an opening of approximately 1 meter for the passengers to enter the passenger compartment from the crew compartment. Both the walls were in very rough shape, and for the most part impossible to restore. Below I explain what I did to each of the walls. I rebuilt the left wall in the summer of 2013 as I finished the walls of the Crew Compartment. I still have to do the right wall.
Left Wall
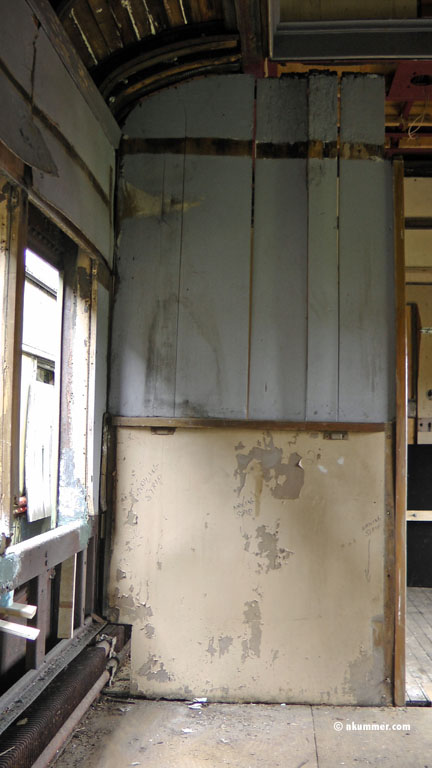
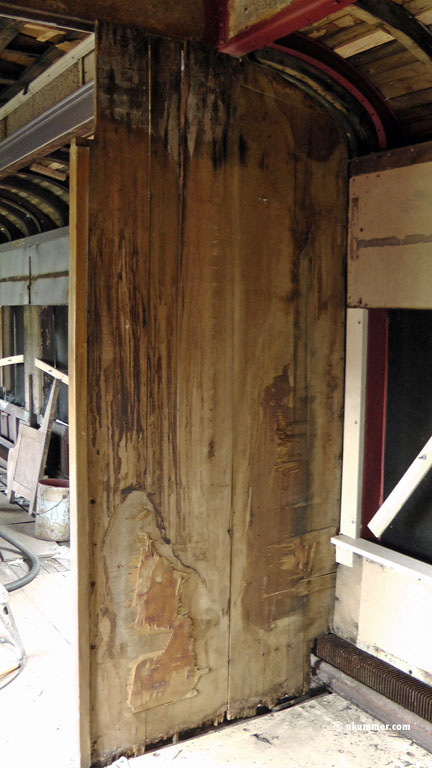
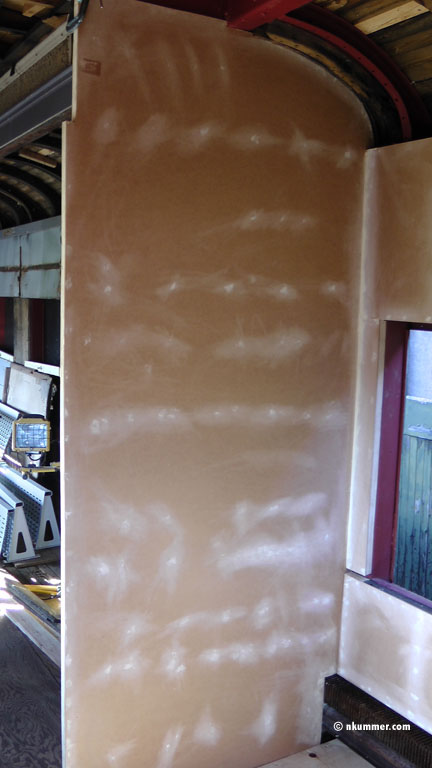
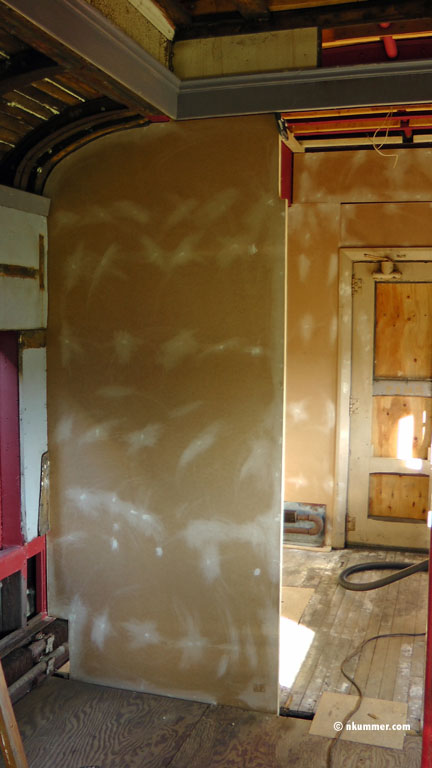
This is a solid wall from floor to ceiling. Below are two pictures of the wall as it was when I started. The first picture shows the side in the Passenger Compartment and the second one shows the Crew Compartment side.
Looking more closely at the Passenger side picture, one can see several problems with the wall. The major problem is that the wood planks that make up the interior of the wall a severely warped at the top, extending almost a meter down. If this was the only problem with the wall I may have been tempted to take it down, soak the top half in water, and try to straighten them over time. Unfortunately there were several other problems, and all combined made it necessary to construct a new wall. In addition to the top being warped, the bottom 7 cm had basically rotted away, and the Crew Compartment side was badly stripped of its finishing material. While the top part of the wall in the picture below looks like it was finished with paint showing its planks, this in fact was not the case. A long time ago a film crew wanted to make a picture in the car and they “refinished” some of it. For this wall they ripped off the covering hardboard (presumably it had pulled away like the rest of it has in the car), and then repainted it purple and installed a piece of trim. It is easy to see behind the horizontal trim where the board was cut.
Here we are looking at the backside. The finishing material, presumably hardboard, had been pulled from it, leaving it impossible to refinish. In the end the only two salvageable pieces were the vertical edge trim facing into the car, and horizontal edge on the passenger compartment side. They were carefully removed and will be reinstalled at the appropriate time.
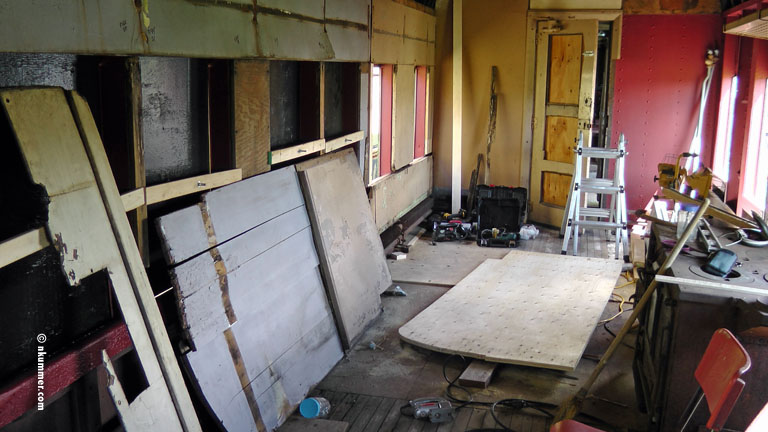
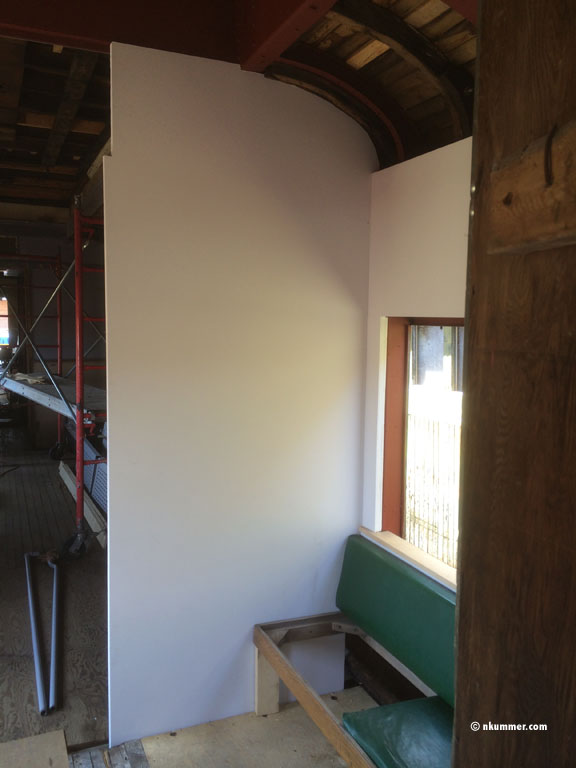
June 30, 2013 – At this point one can see that the old wall is down and lying against the car wall. The new wall is lying in the floor about ready to be installed. The wall is 98 inches, or 2 inches longer than a standard sheet of plywood. I made the new wall from 2 pieces of ½ inch plywood overlapped for 94 inches, and then two scrap pieces to make the last two inches. In then glued and nailed the pieces back to back providing it the necessary stability to last a long time.
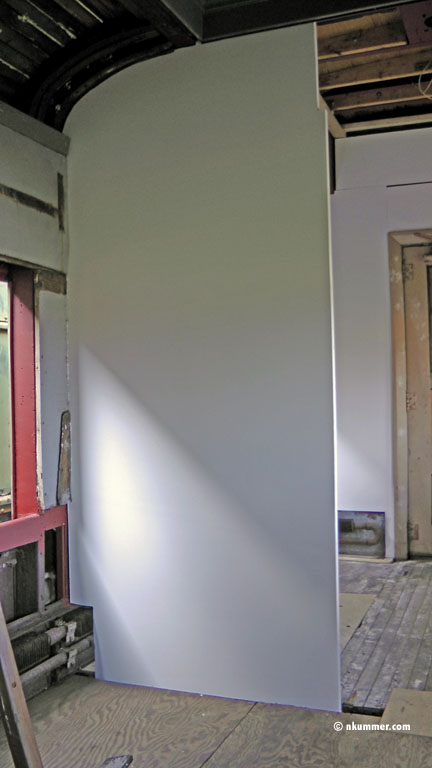
Once the wall was up I covered both sides in ¼ inch hardboard for finishing. I then covered the nail holes and sanded everything smooth.
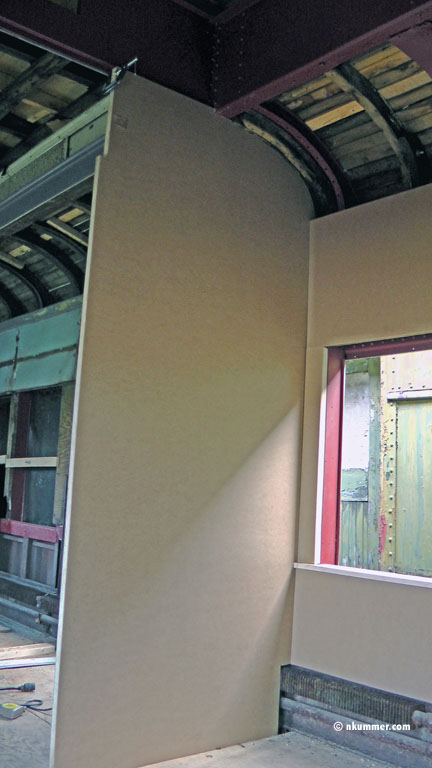
Here we have the wall primed and ready to go for it final coat of paint.
This is as far as I have gone with it today. At some point it will get a finish coat of paint with the rest of the car, and when it does I will update this document.
Right Wall
The right wall had already been taken down when I got to the car. The picture below shows an “exploded” view of what is left of the wall. Basically it is in several “sections” and will need to be put together gain. One will notice that this wall is not solid, but has a screen in it’s upper half. Presumably this was to allow some of the heat from the wood stove into the Passenger Compartment.
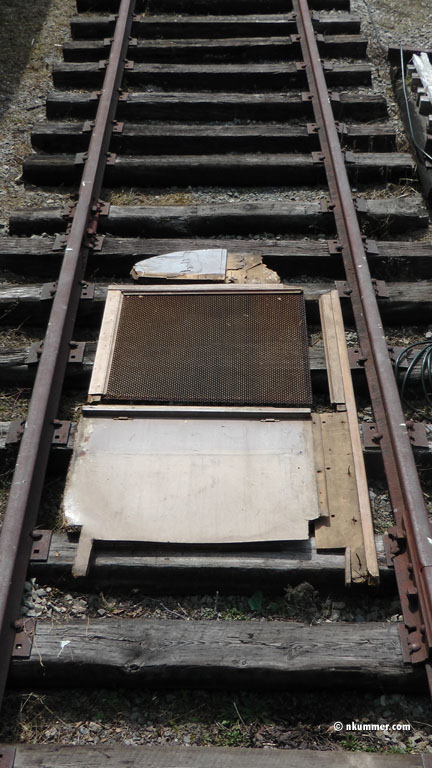
Except for some of the trim pieces, this wall also needs to be rebuilt. I have not started this project, and it is unlikely I will do it too soon. For now I need the freedom to move large pieces into the Passenger Compartment and placing the wall in place will prevent that. Additionally, the wood stove needs to be in place as it will not fit through the opening once the wall is in place.
Once I work on the wall I will update this section of the document.