Overview
The walls in the crew compartment can be broken out into four regions based on the restoration work required:
- The front wall to the right of the exit door and the right side of the car
- The front wall to the left of the exit door and the left side of the car.
- The left partition wall between the crew and passenger compartment.
- The right partition wall between the crew and passenger compartment.
The two partition walls are projects unto themselves and are described in the projects section of this web site. To recap, the partition two walls run about 3 feet (1 meter) perpendicular from the side wall towards the center of the car. This then leaves about another meter of opening for the passengers to enter the passenger compartment. See the Floor Plan if you are unclear.
While this section (Walls) is broken out into two major sections, right and left, and the window frames and ceilings are in pages of there own, there was quite a bit of overlap when I worked on them. For the most part I did prepare all the steel work before I started any of the walls and ceiling finishing work.
Right Side
The right side of the crew area is where the stove belongs, and therefore these parts of the wall were covered with galvanized steel with insulation behind it. By the time I started work on the car it was all long gone, and I suspect it was gone even before the car came from Toronto.
The steel has been cleaned up and primed, but the wall is left open and uncovered. This provides visitors a good view to the structural design of the car. It is the only opportunity for visitors to see “behind the wood”.
May 24, 2012 – This is what the car looked like when I inspected it at the beginning of summer, before I had decided to take on the project. Shortly after taking the pictures I decided to head to Europe for two months, so nothing got done.
August 06, 2012 – The first thing was to sand/grind down the walls and window frames. For the most part I used an angle grinder with a wire brush attachment to remove the rust and get the steel looking better. It was a super messy job, especially when it was hot in the car, as all the dust really stuck to me. And yes, I did wear a face shield and respirator mask. When I sanded the steel in this part of the car I also did quite a bit of the ceiling. Here you see the first coat of primer on the front wall. I learned a good lesson here that you really need a good brush, and rolling is better than brushing. All future jobs went much smoother with much better results.
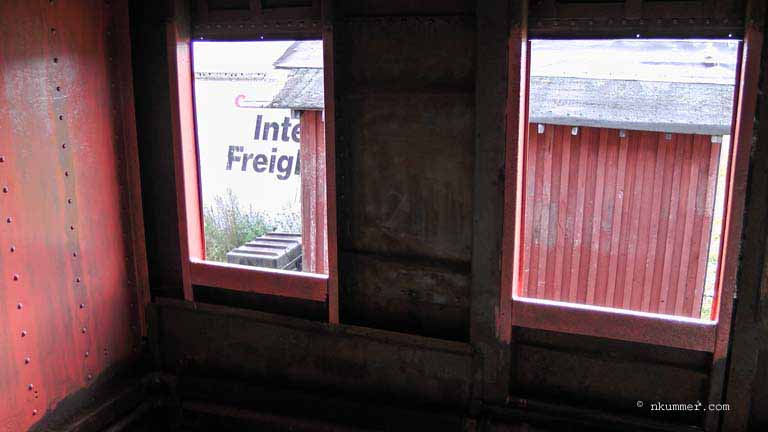
August 06, 2012 – The window frames are also complete. They actually needed quite a bit of preparation as they had rusted through in some places. In the section “Crew Compartment – Steel Window Frames” you can see in more detail the work I did to them. All that to say, it took quite a while to get to this point.
August xx, 2012 – Some time later I am all done. Looks much nicer with the proper second coat of primer. The black pieces of wood in the windows are part of my Winter Window Cover project. You can read more under “Projects – Winter Window Covers”.
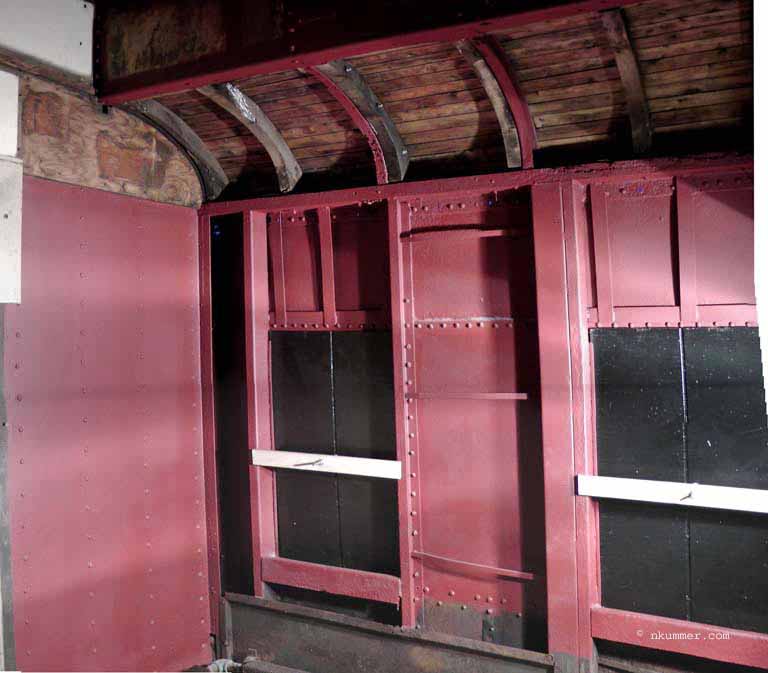
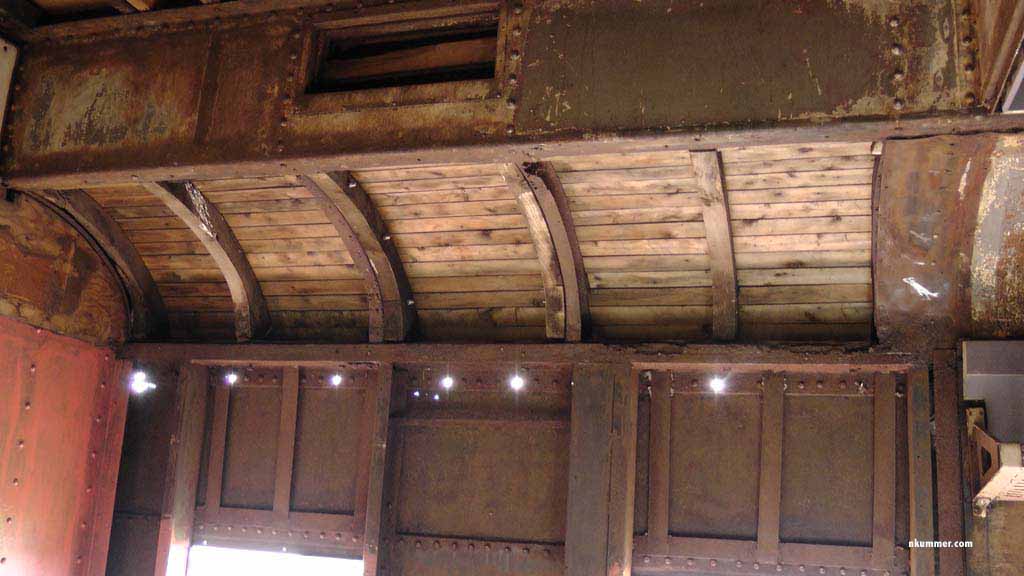
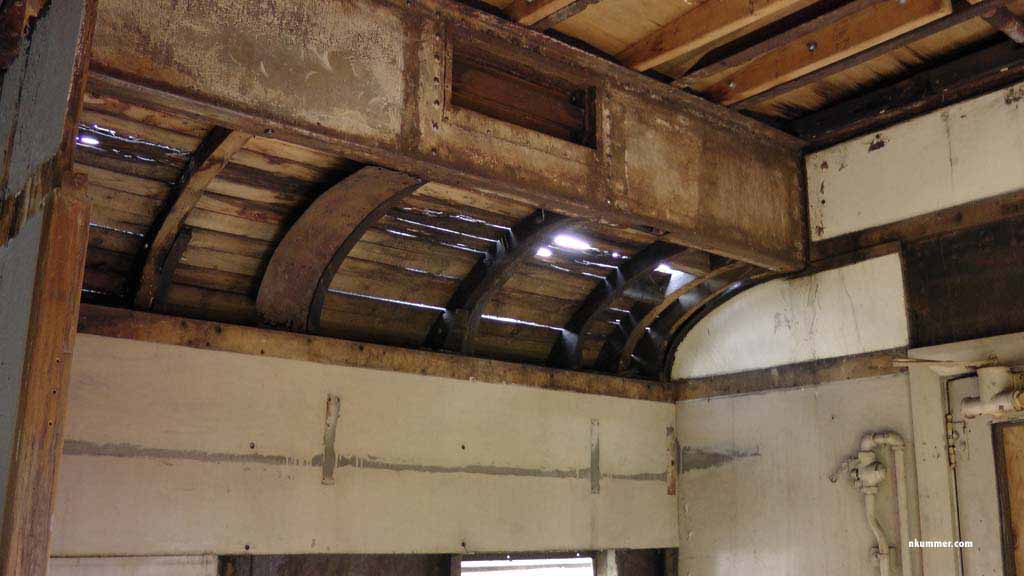
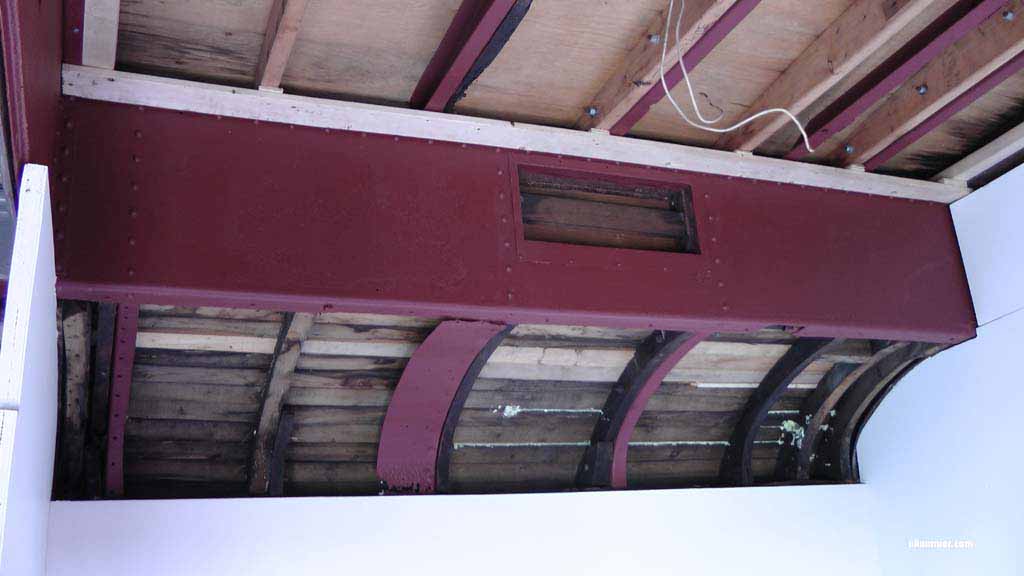
And looking a little hire up, but with natural light. It appears that the curved section was finished in galvanized steel, so it will remain unfinished in this car. The straight section in to the clearstory was finished, so it will also be completed at some point.
Left Side
The left side is more like the rest of the car is it is finished in wood. This side of the crew compartment contains the wooden seating bench, which you will see later. For the most part the wood in this area was still firmly attached to the walls, and what wasn’t was still lying around in the car, so I just reattached it. However, the wood had enough damage that a simple paint job was not going to make the walls look good. The walls are built from ¾ inch plywood and ¼ inch Masonite (hardboard) over top for finishing. The existing hardboard is glued to the plywood and does not come off easily, so my plan was to just add another ¼ inch piece over top, which is what I did. I nailed the new hardboard to the wall with fine finishing nails, patched the holes, and painted.
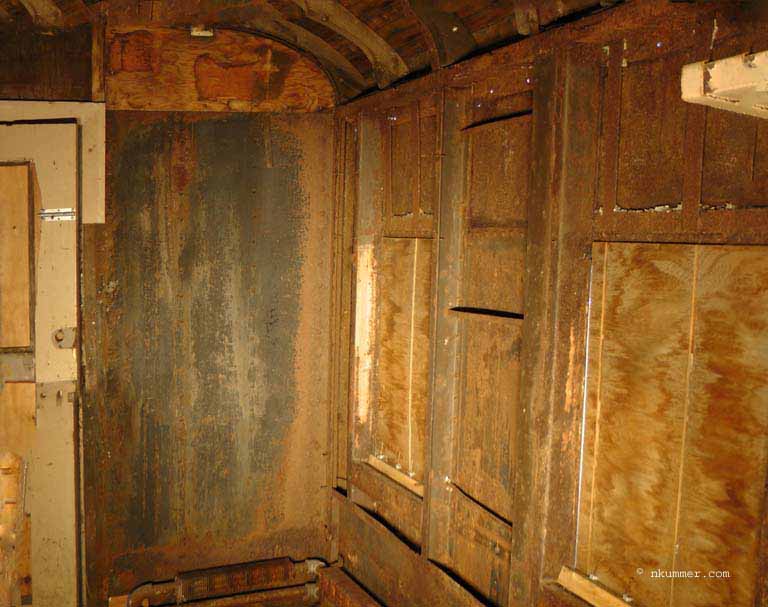
May 17, 2012 – The next two pictures were also taken on one of my inspection trips prior to starting any work. It should be a nice and dark corner, but the roof and window cover let in plenty of light :). The stuff stacked on the wood stove has probably been there for at least 8 years.

August 21, 2012 – After some sorting, shovelling, sweeping, and vacuuming, this is what I started with.
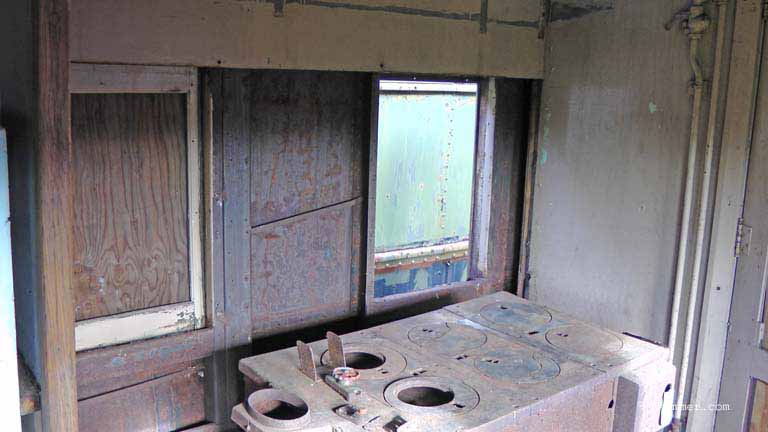
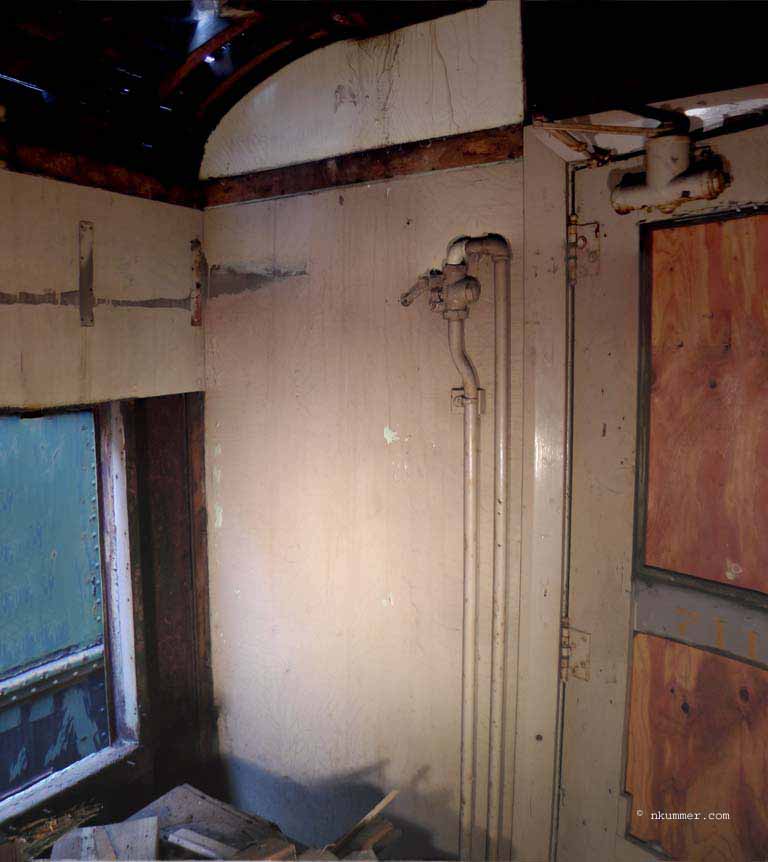
August 21, 2012 – Here is better view of the front wall. Notice the airline valve. I took this down, sandblasted the whole thing, and now it looks like new again. It was actually a bear to get off, and took several hours and some heavy pipe wrenches to remove it all. Those joints were really rusted in place. We did manage to get it off without cutting anything, so it will be easy to put back together. For some pictures of this work, see “Crew Compartment – Emergency Air Release Valve”.
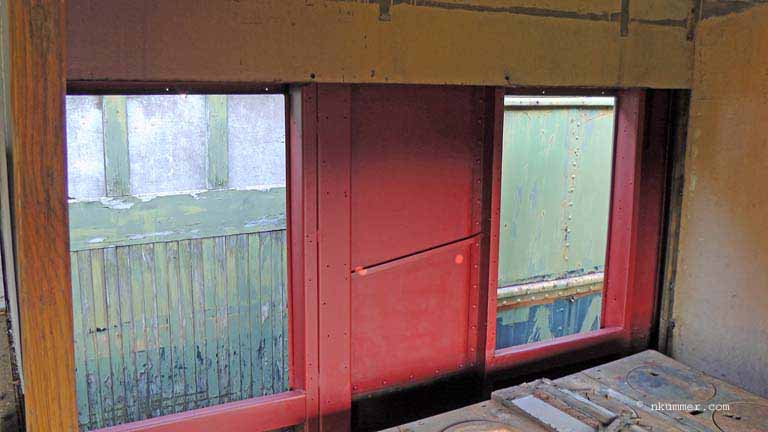
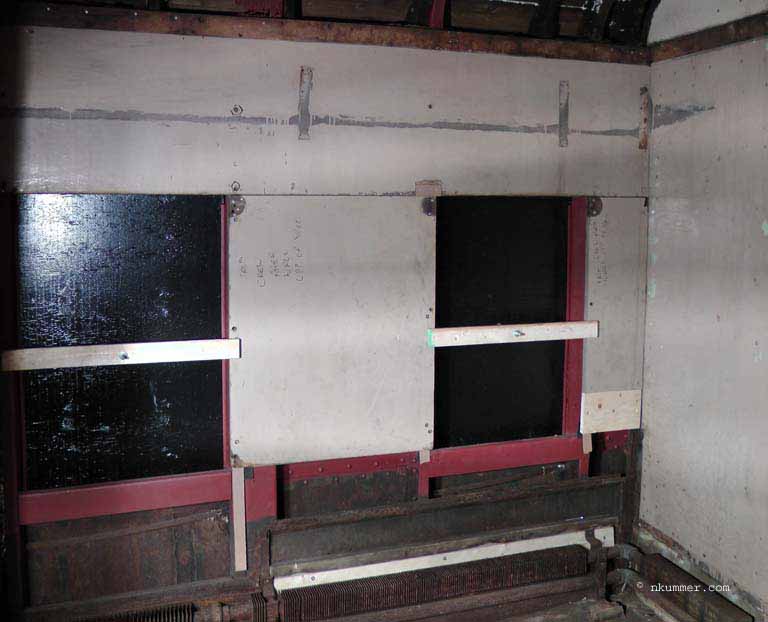
August 21, 2012 – This is the front wall just over the door. The trim has been removed (no idea when) and one of the center wooden panels has fallen out.

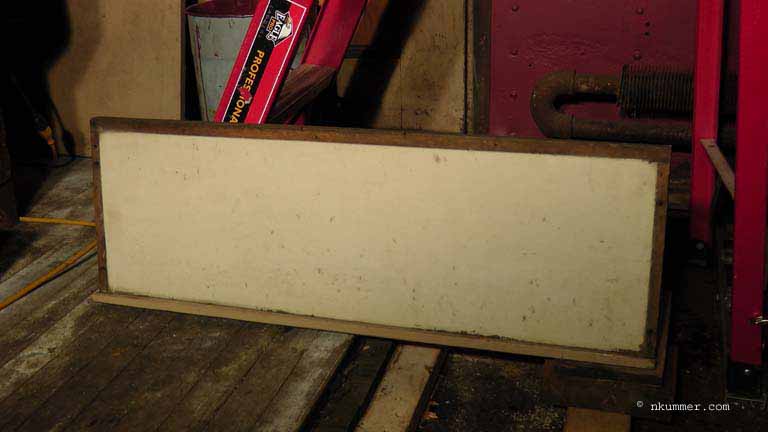
August 21, 2012 – Here is the missing piece of wood.
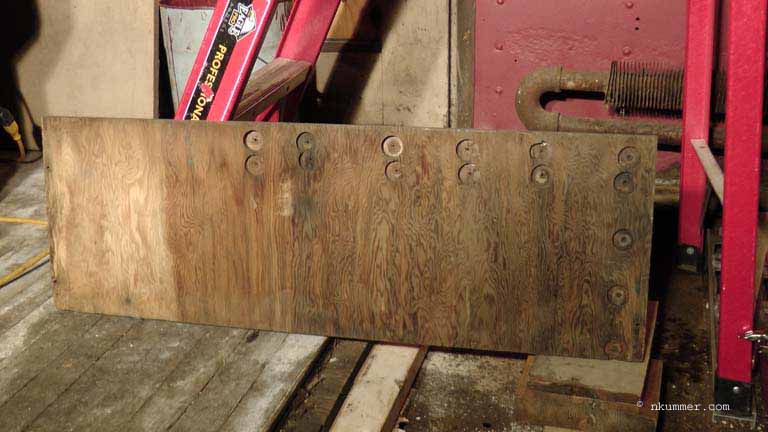
August 21, 2012 – Just a curiosity. This is the back and you can see where CN removed the wood to fit over the rivets in the steel work.
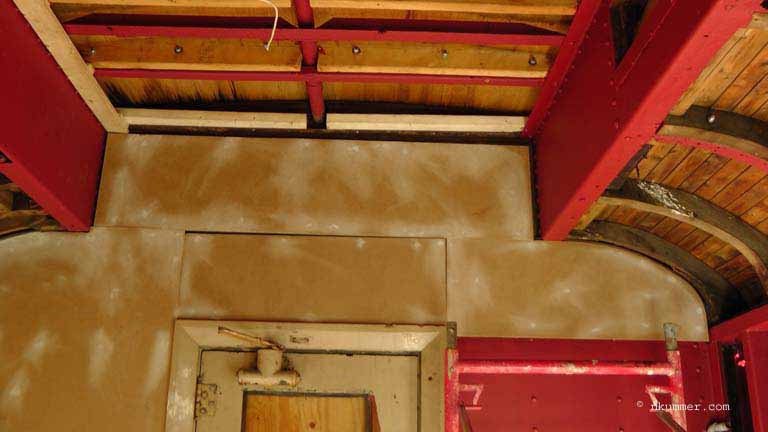
August 30, 2012 – The steel walls and clearstory section on this side have been prepared and primed. The wood on this side had been removed in the previous restoration attempt (more on this next picture), but the upper portion was still there, firmly attached to the steel. I did try to remove it, but only about 4 out of 12 screws came loose. Since the wood itself seemed okay, I just decided to leave it as opposed to creating more work. I did add a couple of extra screws in places where I was able to remove the broken screws.
December 23, 2012 – So by the end of the year I had put back the two lower pieces of wood that had literally been ripped off the walls. I found them in the car piled in some junk. You can see that the right piece has a new bottom piece. I had to make a new bottom section as that area was too mangled to use again. All the pieces are attached with 2.5 inch Wade Head self-tapping steel screws. I use these screws everywhere to attach wood to steel. On the front wall, if you look carefully, you will see a pile of screw heads near the top (below the trim level), down the side, and at the bottom. Water had been running down the walls and “removed” the glued hardboard from the plywood. I needed to get it reattached before I could add my new layer of hardboard. Given that it was going to be covered, using screws was a good idea. I still need to add back the bottom layer of wood to the left wall, just below the windows and above the steam pipes.
So this is where I stopped in 2012. I would not get back at the car until April 2013, picking up where I left off.
April 23, 2013 – I installed the original wood back on the lower left wall and also the new hardboard on the front wall.
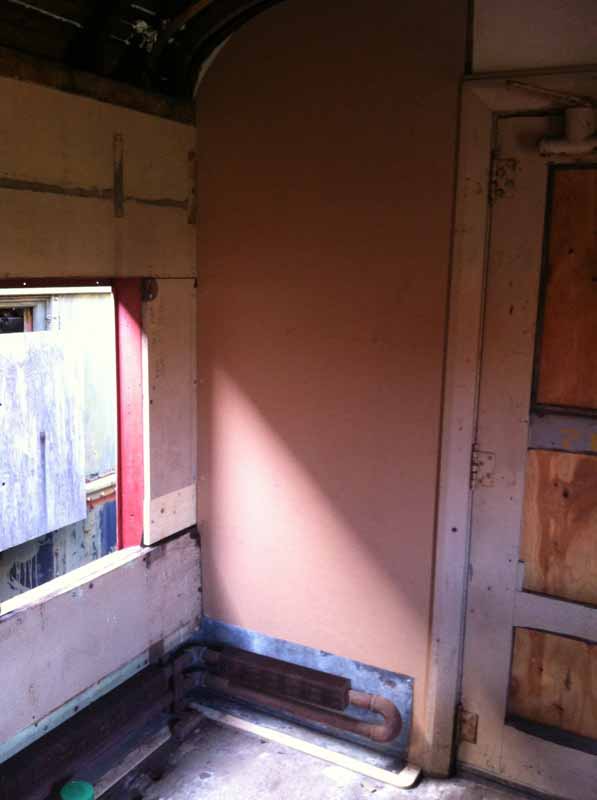
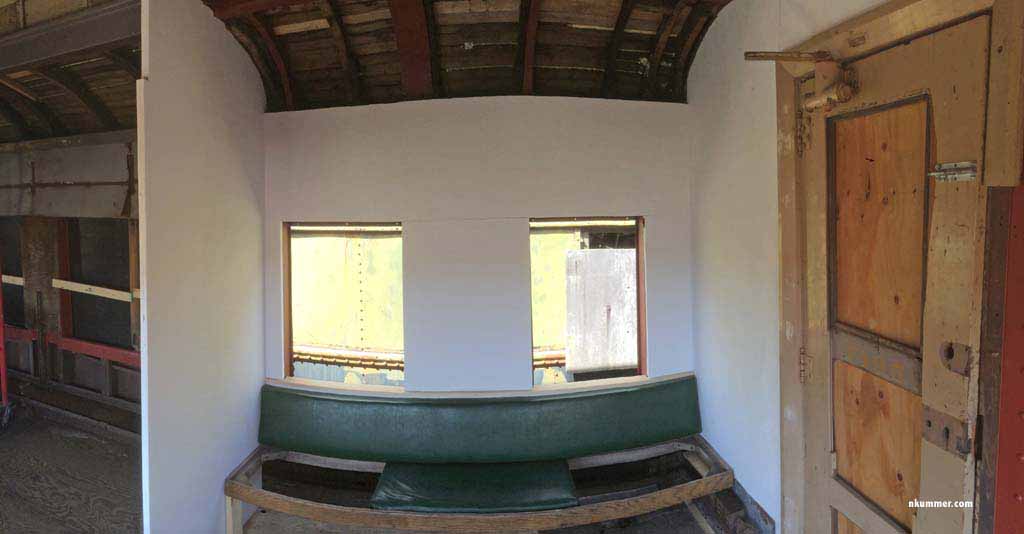
July 04, 2013 – So now we have progress. As you can see all the walls have now been covered with new hardboard and thing are looking good. So why did it take so long …. Because several other things needed to be done before I could cover the walls. The two main things were the remaking of the partition wall (yes, the left wall in the picture is brand new. See “Projects – Left Partition Wall” and the wood trim for the windowsill (made from maple).
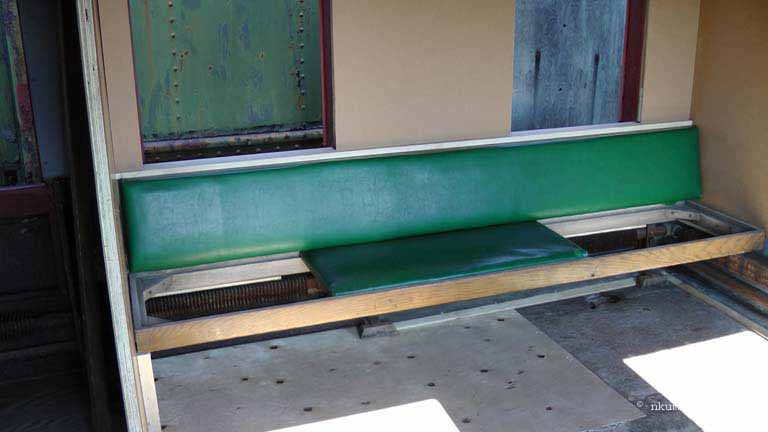
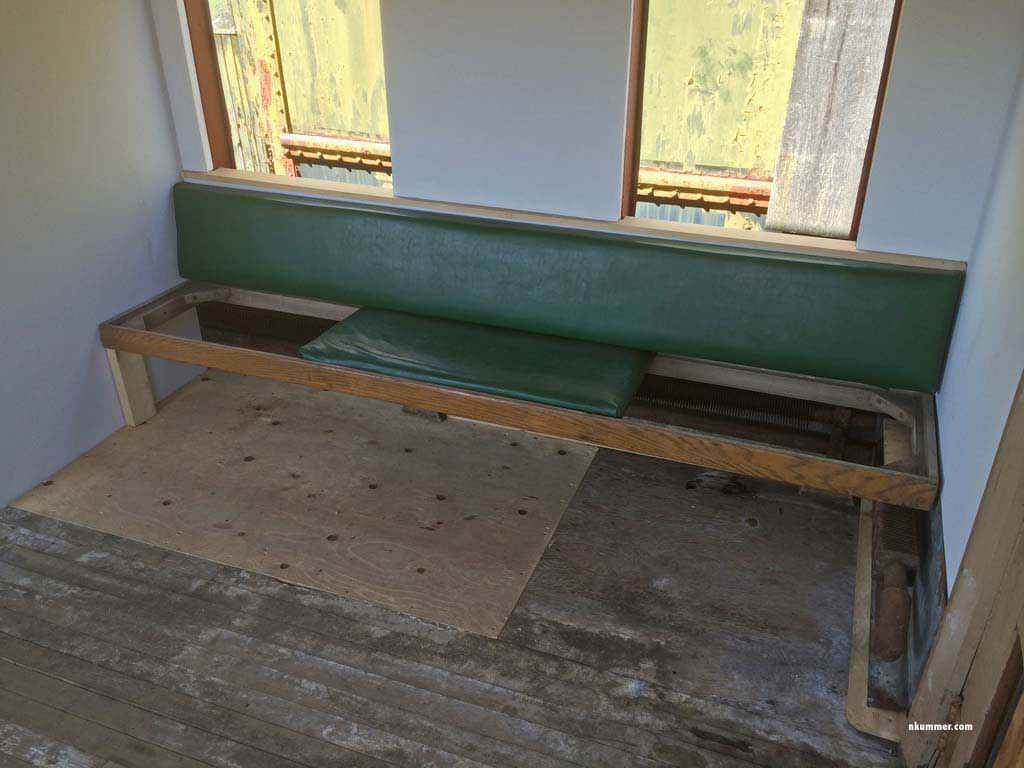
July 04, 2013 – I could not resist digging out the bench seat, cleaning it up, and seeing how it looks in place. Even the wood window trim is in place, however both are just for show. I am still a ways off from permanently putting them back in place. You will notice that I am missing two sections of the seat. I am told that they never made it from Toronto. This is unfortunate as it appears to be the only seat part missing in the entire car. At some point I will get some material and make new ones.
September 29, 2013 – So I am back working on the walls. August was spent in Europe and September was the time to work on tarring the roof. Now I am filling all the nail holes and sanding it all down.
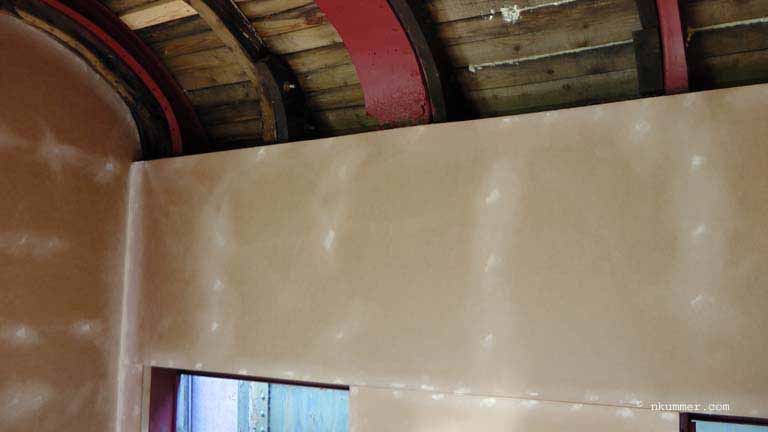
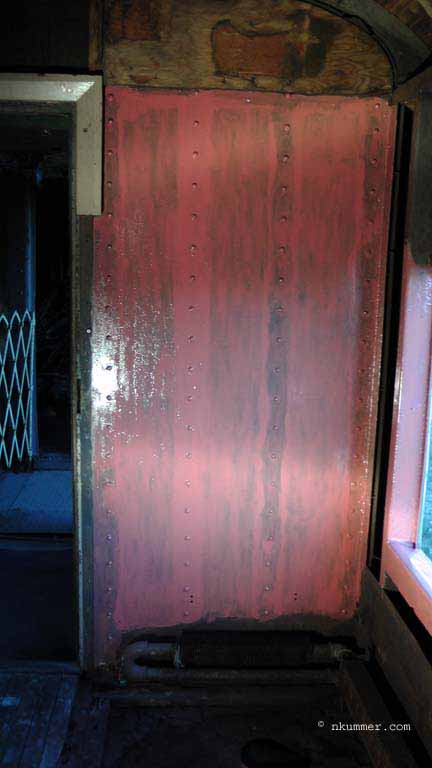
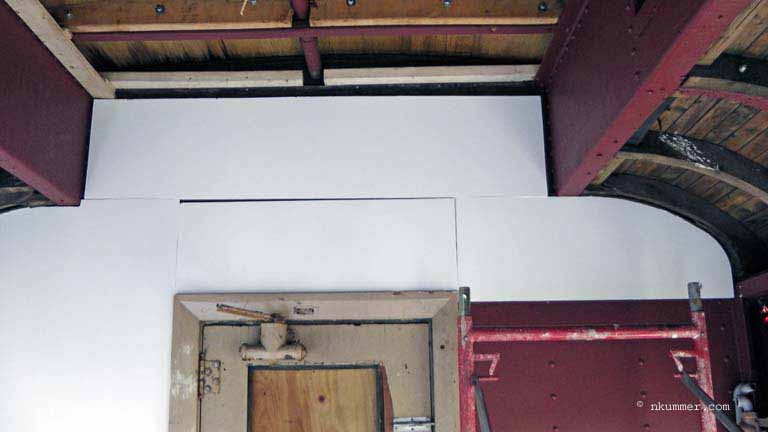
October 03, 2013 – The front wall has been fixed and also has new hardboard. If you are wondering about the crooked installation and the gap that goes with it, I am just following the CN template J. It will be covered by trim. You can also see that I have been hard at work in the ceiling area. I have finished sanding all the steel there and primed it. I have fixed a ceiling joist over the door, and I have installed the first piece of ceiling strapping to hold the new ceiling.
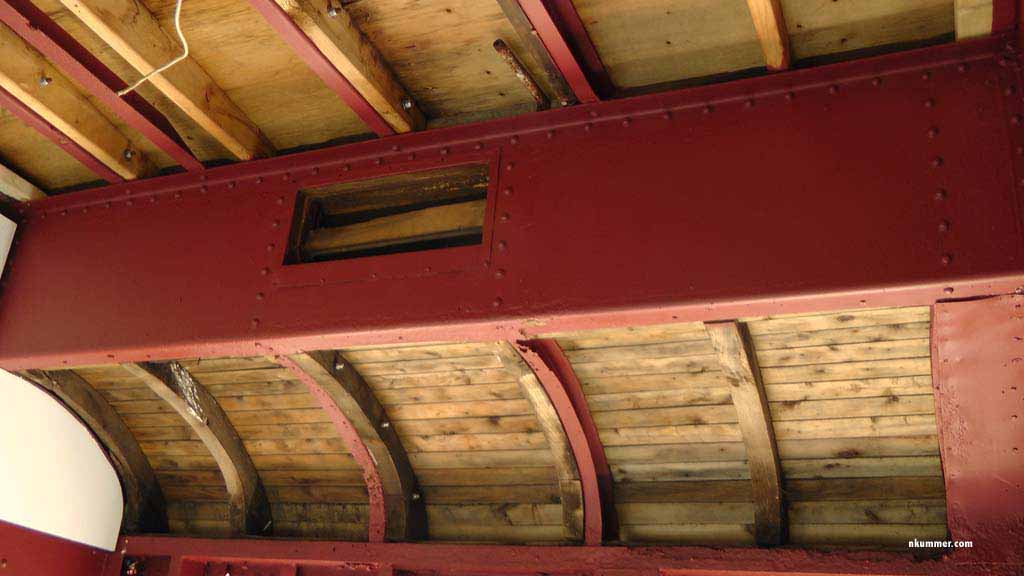
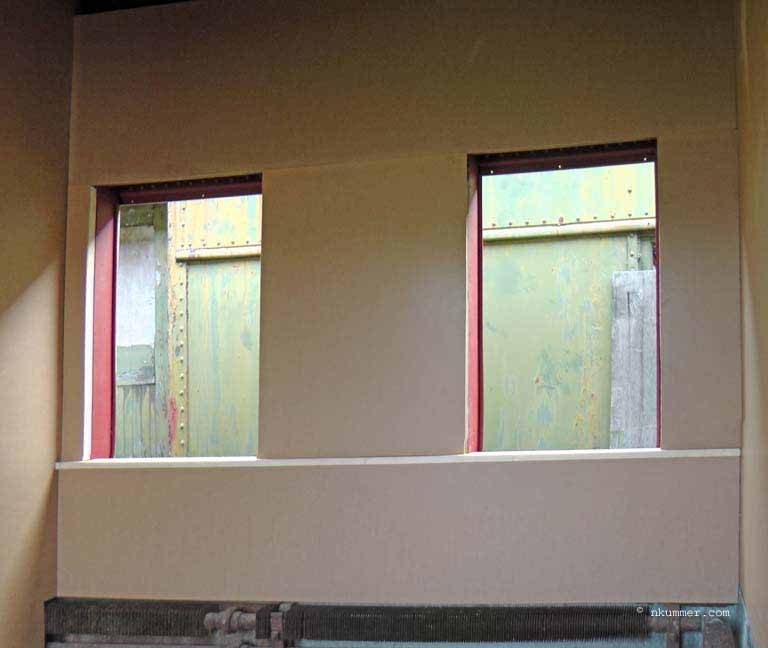
October 10, 2013 – Two coats of primer paint and we are looking real good. The picture below looks distorted as it was taken in a panoramic view, but it does give a good idea what it looks like at this point.
A view into the clearstory with the steel primed. You can also see that I have started to put in the strapping for the ceiling.
A view of the front wall. In case you are thinking I did a bad job of placing the hardboard on the wall (it is a bit crooked), I covered the exact material CN had originally put up. The trim will eventually cover the gaps.
The seat once again temporarily installed.
Once I start to finish the trim work on the walls I will add to this section. The ceiling work of the crew compartment can be found in the section “Crew Compartment – Ceiling”